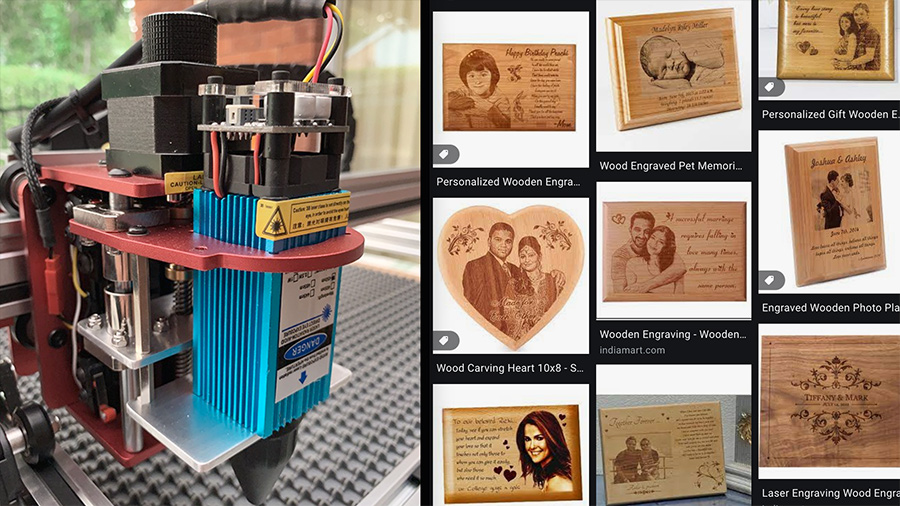
Laser marking is not only a fashion but also a business. Nowadays, wooden engraved photo machines are ubiquitous in the market. There are plenty of laser marking services on etsy.com. perhaps, if you wish to buy the original machine, you can go to amazon.com. You can purchase it and laser engraved pictures on wood anytime. Laser cutting sometimes risky and professional. So, you must know how to use it. Thus, this article will demonstrate how to laser cut at home. In this article, we will learn how to make a laser engraved picture.
The formalities before laser cutting steps are essential to get a perfect cut. However, first, we will determine these formalities and will know how to prepare. After that, we will jump into the steps to make laser cit picture printing.
Choose an appropriate laser engraving machine
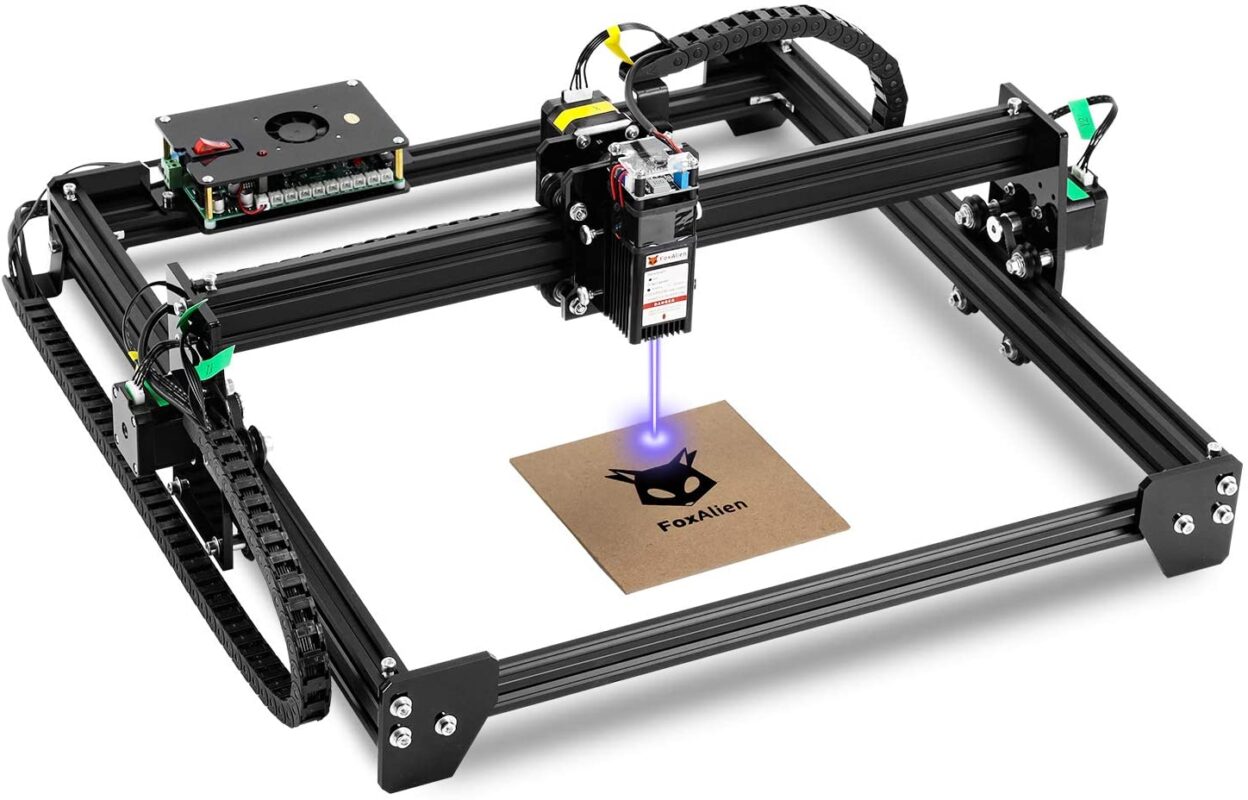
Depending on your picture frame, you must decide on the laser engraving machine. In general, the mini laser engraving machines have an approximate dimension between 400 mm x 400 mm. These sizes are perfect for any laser cut at home. “Best Laser Wood Engraver” can help you get the best laser wood engraver machine available in the USA. This content demonstrates the ten best laser engraving machine in 2022 available on amazon.
Choose a proper wood and plan for the specific frame
To get professional laser printing, you must decide the exact wood or board. Resinous wood makes darker burn, and non-resinous wood makes lighter burn. So, depending on the image’s pixel and clarity, you must decide the appropriate wood for laser printing. “How to choose the best wood for laser engraving” will help you understand more about woods and will help you to choose the best wood for laser printing. Usually, we use Alder, cherry, and maple woods based on the picture types.
Laser engraved pictures engraving steps
We would recommend reading the precaution part if you didn’t read that before. There are some precautional steps that you might forget while doing this operation. So, you must be cautious first. Though these steps are elementary to operate, but yet they are harmful sometimes. Now let’s jump into the details.
Choose a quality photo

If you are familiar with the pixels and an image’s resolution, this part will be easy for you to understand. If you got the better pixel images, will provide you with the better BMP output and better printing. We recommend you choose the picture with the pixel size of more than 508 pixels per inches. On the other hand, try to choose a picture with less background. When you print a picture with a background, that will mix with the focusing part. The printing will not be professional.
Edit the photo
Editing photo is also very essential for the better laser-cut output. First, crop the image if it requires. After that, remove the background. And then, if you want the background, try to decrease the dark part of that image. And increase the contrast of the focusing part. Another reason for doing this is the BMP part. The dark part will get the dark dots, and the spare parts will get light dots. If you want to focus your image, try to remove the background, or edit it properly. Lastly, convert the total image into the grayscale pattern.
Covert the edited image into BMP format

BMP or Bitmap image format is the mapping from some domain to bits. If there’s no BMP conversion system in your editing software, you can use other software to make it. The output should be 200 pixels/cm or 508 pixels/inch. In this case, the method should be halftone screen frequency with 200 lines per cm or 508 lines per inches. The conversion angle should be 15 degrees. And the shape should be round. The depth of the bit map is 1 bit. This setting is a general idea, and you can customize it according to your choices.
Laser engraving program
There are a good number of laser engraving software that you can use for your laser cutting machine. Usually, the machine providing company delivers the product with the software. So, you don’t need to worry about the software for operating your laser cut marking machine. To set the setting in the laser engraving program is easy. It would be best if you kept in mind some techniques, such as the wood fibers and image, should be parallel to the long axis (X). Additionally, you can rotate your image 90 degrees if necessary.
Operation
Check out the initial points and set the parameters for 40watt power laser. The speed should not exceed 300 mm/s. In this case, the power percentage should be 20 with an interval of 0.05. After that, check all of the above settings and parameters. Finally, place your wood on the stage and check out the plugs and inputs.
Precaution
The wood laser engraving machine is less powerful than the metal laser engraving machines. Thus, these machines are safe and reliable. Yet you must follow some precautional steps and maintenance.
- Wear safety goggles every time you operate this machine.
- Make sure that your machine is connected to the grounded wiring system.
- Maintain every parts and mechanism after the uses of the machine.
- Place the wood and marking gun in the right coordinate system.
- Do not place the machine on any electrical appliances.
- Test your machine before go for the final operation. It will help you to know the present condition of the machine.
- Keep away this machine from the kids.
Summary
Wood laser engraving photos are fabulous fashions and decors. These wood photos are also a perfect gift for any birthday or Christmas party. Moreover, you can use this machine for your starting business too.
We have explained how to do wood laser engraving to a wood photo. Make sure that you bought the right machine for these operations. There are lots of powerful machines, and some are for marking, some are for cutting. On the other hand, some laser machines are for woods and plastics, and some are for metals. So, based on your requirements, you must choose the right machine for your business.
We hope this article will help you 100% for laser engraving wood photos or any laser markings. But this article is not suitable for laser cutting or marking on metals.